13 January 2008

Holiday Jars

I washed & saved spaghetti sauce jars for months, and here's what happened to them in December. My children and I made white chocolate covered pretzel rods (with red/green sprinkles), and filled these jars for teachers and incidental gifts. Was nice to have them on hand for an oh-I-should-give-them-something gift. These took a while to make, only b/c I was creating a bunch of different designs for fun; if I had made them all the same, it would have gone much faster!


Stamp Sets: Cold Play (retired), Riveting (retired Hostess),
CS: Holiday Thyme DSP (retired), Dashing DSP (retired), bashful blue, brilliant blue, old olive, white
Ink: Olive, Cranberry, Real Red
Ribbon: cranberry stitched (retired), wide red grosgrain, narrow white organdy, nonSU wide organdy, blue grosgrain, silver cord
Punches: word window, scallop, large oval, circle (3/4", 1", 1 1/4", 1 3/8")
Other: various sauce jars (Bertolli, Ragu, Paul Newman), white gel pen, crimper, ATG 714 gun, paper snips

Labels: ,

20 November 2007

My Stamping Space

I enjoy looking at everyone else's stamping spaces, so I thought I'd finally share mine. I used to have the whole basement to myself and, while it sounds ideal, it was a nightmare in retrospect. If any object could live on a horizontal surface, it did. Stacks of stuff I never put away. And I ended up stamping on the floor a lot. Or the surface of my guillotine cutter, because it was the only free space on a 6-foot table. It was ridiculous.

I am a stamping slob.

So. 
Last year we finished off half of the basement for my husband's home office, and built into that room a VERY large closet for me. One that would force me to clean up after every project, basically, with a folding table I put out and fold up after each stamping session. Sounds awful? It works perfectly for me. The doors are purchased but not hung yet, so it's an open closet at this point.

Here's a full frontal view.
The permanent table is not where I stamp, but where my trimmers & cardstock live. At the back left are 2 hanging file crates with cardstock. Underneath the table are rolling drawer carts (2 deep, there's one behind them) where my stamps, gift supplies (raw materials like empty jars, blank candles, composition notebooks, etc), and current projects live. See the ATG gun peeking out from on top of one of them? LOVE that thing!

At the back wall are my DZyntec (sp?) ink/marker/dauber holders. I have 5 of them, one for each SU color group. I have all inks and markers, but still working on reinkers/daubers/sponges for each color. They don't make these holders anymore, but when they were going out of business the enablers at SCS whipped us all into an ordering frenzy. I do love them, though. Under the ink holders are my beloved Tilt Bins (more detailed pics of those in a minute).


Okay, now here you're looking to the right of my Center Stage, with tons of those stacking drawers and my New And Improved punch holders (details on that below). The drawers hold loose, small stamps, scissors, pieces of stamped art I need to complete, adhesives, eyelets/brads, tools (bone folder, mat pack, brayer, eyelet setters), applicators (aquapainters, sponges, blender pens), and my wheels/cartridges. Let me just give a big shout-out right here to the Wondrous thing called the Label Maker: one of those things I thought was frivolous and now cannot AT ALL live without.


To the left of Center Stage, you see my folding table that I actually stamp on (leaning against the door frame), shelves on the wall hold ribbon scraps (in jars), xyrons, pearlex spray, CE, color wheel, and -on 2nd shelf- my embossing powders and glitter in gladware. LOVE this idea, as the powder pal trays and I did not get along.  I keep each color housed in its own container (nicely LABELED, of course) with its own plastic spoon. Pull out what I need, spoon the EP on the project over the container, and there's NO cleanup.


Here are the beloved Tilt Bins that I saw in another SU demo's stamping room at an NC SU demos quarterly meeting years ago in Greensboro, I think it was. The larger ones house both completed cards (LABELED by occasion) and larger scraps (LABELED by color family). The wee bins on top house smaller scraps by color family. Let me assure you, I ran RIGHT OUT after that meeting to the nearest Home Depot to find them. Actually found the small bins there, but had to order the larger ones online.


To the left of the Tilt Bins are my stacked SU ribbon holders. I really like them for what I need right now. Had I a zillion dollars, I would have bought the Craft Locker ribbon storage, but it works for me (I do have the Craft Locker Wheel and Handle locker on order, though!)


Here's my SupaCool punch 'rack'. I bought pre-cut dowel rods in an assortment pack at Walmart, came home and grabbed my husband's bullet level, and coffee mug hooks. In about 20 minutes, I hung these up, and wahoo! - punches all in a row. I LOVE it.

Labels: ,

21 October 2007

Happy Jacks Treat

I made over 50 of these for my kids' classes, so it had to be easy! Crimped the bottoms, filled with candy corn, stapled yarn tags to top. Stamped "From, xxx" with Karen Foster snap stamps - quick!


Stamps: Happy Jacks Wheel, Too Terrific Tags, Karen Foster snap stamps (mini casual font)
Ink: Only Orange, Basic Black
CS: heavy copy paper, orange, white
Other: large & small tag punches, 1/8" circle punch, black eyelash yarn, paper crimper

Labels: ,

19 June 2007

Refrigerator Message Center

Here's another gift I made a while ago - no stamping involved, though.

I found this already-painted tile at a thrift store, and made the message center around that. The first photo is too bright, the 2nd too dark - somewhere in the middle is perfect exposure and I don't have the time to play with the pictures today, so you get both.


  • I mounted a piece of Lovely Lilac cardstock to a page-sized piece of chipboard with sitcky strip.
  • I mounted the tile to black cardstock with E5000 glue and clamped with tiny vice grips until dry. Then mounted to the lilac base.
  • Then the cork and post-it squares to black CS and then the base.
  • The thumbtacks are glass pebbles on top of 1/2" circles of lilac cardstock, on top of flat-head tacks. All adhered with crystal effects.
  • Thick magnet strips all over the back keep the heavy thing on the fridge!
  • Then a purple dry erase marker completes the set.
  • Labels:

    18 June 2007

    Merry Frame

    I forgot to share this project when I made it, so here's a little Christmas in June:


    Stamp Set: Letterpress Alpha
    Ink: Cranberry
    CS: Holiday Thyme DP, vanilla, old olive
    Other: Crystal Effects (to lacquer the hanging poinsettias), 1/8" hole punch, gold cord, cranberry stitched ribbon, narrow black organdy

    Labels: ,

    16 May 2007

    Cup Cards

    I'm a few weeks behind on this new trend, but that's really on-top-of-it for me! But I needed some teacher gifts and it was the perfect time to test out this project for a stamp club:

    Tutorial for the cup card is Here. Love me some stampin' fanatics over at SCS.

    Here's a basic card for my daughter's teacher, for a gift of summertime stuff:


    A hang-tag card on a gift for my daughter's assistant teacher:


    It really does look harder than it is. Didn't take long at all, and not much stamping! I used 3 different retiring stamp sets, only one stamp out of each set.

    The little faux-lime I made just cracked me up, as I had been wishing I had some sort of citrus stamp. That was a last minute inspiration, otherwise I would have changed the layout of the card to the straw in the middle of the two 'circles' (lime and moon). It's still cute and happy.

    On the tag card (2nd pic) I rimmed the cup with microbeads as in the tutorial, on the standard card (top pic) I rimmed the cup with dazzling diamonds glitter. I think I like the glitter more (drat it all, it's so bloody messy!). And I put some stray lines of glitter in the sponged sand, too. The tutorial card has more ambitious sand, using real play sand mixed with glitter - but I was on a time crunch, so I downgraded.

    Stamp Sets: Think Big for the 'lime' (Holiday Mini 2006), Simple Shapes for the sun (retiring), Petal Pushers for "smile" script (retiring)
    CS: WWhite, Tempting Turquoise, Basic Black, Vellum CS
    Ink: Turquoise, Creamy Caramel, Regal Rose & Always Apricot (sponged on cup), Barely Banana & Summer Sun (on the sun)
    Other: sticky strip, dazzling diamonds glitter, clear microbeads, 1/4" hole punch, nonSU ribbon, stampin' sponges, aquapainter

    Labels: , ,

    08 April 2007

    Anna Kate Name Frame

    My daughter's friend had a birthday recently and I've been wanting to make a name frame, so this was a perfect opportunity. I really wanted a white frame, but couldn't find one, and didn't have time to paint it, so this natural one was the best candidate:


    Stamp Sets: Letterpress Alpha, Paisley, French Script, Print Pattern
    CS: wwhite, barely banana, pretty in pink, Candy designer paper (retired)
    Ink: banana, pink
    Ribbon: pink gingham, pink grosgrain, white grosgrain, gold cord, pink organdy (nonSU)
    Other: nonSU hardware, soft subtles buttons

    Labels:

    27 February 2007

    Julie's Magnet Board


    Another lookie, lookie what my friend Julie made - this was my Christmas present from her!

    Although there's no stamping involved, you could easily incorporate some. She found the aluminum squares at Big Lots for $5 (and bought them out!).

    Love the earthy striped ribbon she used, and the bottle caps have matching paper and buttons in them, and coated in Crystal Effects. SO cool, I love it.

    Her Christmas present from me is STILL not finished. Because that's how we roll around here, but she loves me anyway. (I'll share it with you once I'm done!)

    Labels:

    13 February 2007

    Magnetic Bookmarks

    Another stamp club project - these little bookmarks clip to the page in the book via magnets so they don't slip out! Clever and easy!


    Stamps: Polka Dots & Paisley, Lots of Hearts Jumbo Wheel
    CS: Real Red, Basic Black, WWhite
    Ink: Black, Real Red
    Other: Ticket Corner Punch, adhesive magnets

    Labels:

    11 February 2007

    Valentines Mailbox

    My sweet daughter and I made her mailbox today for 1st grade valentines arriving this week. She did all cutting, and stamped her name. Easy Peasy template from SCS (Qbee, I think), so cute! The door opens by untying the ribbon. There will be 3 prizes awarded, and she's convinced she'll win one!


    Stamp Sets: Lots of Hearts Jumbo Wheel, Brushstroke Alpha
    CS: WWhite, Real Red
    Ink: Real Red
    Other: Sticky Strip, White Grosgrain Ribbon, Horizontal Slot Punch, non-SU "lips" brad for flag.

    Labels:

    20 January 2007

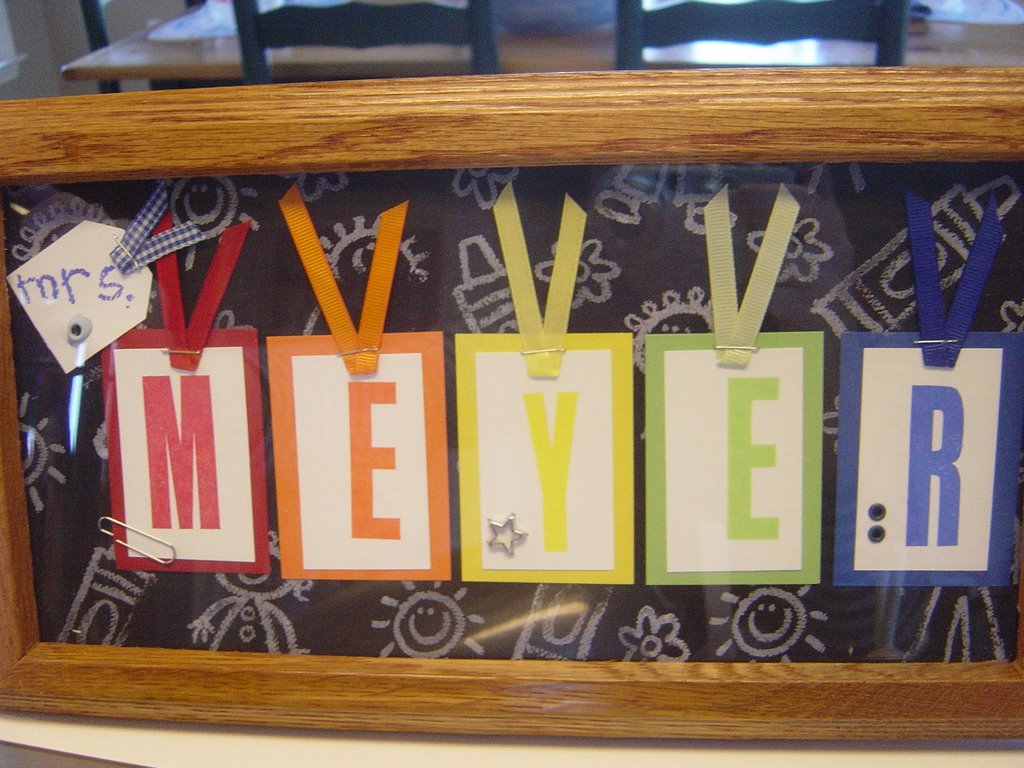
    Teacher Name Frames


    Christmas gifts for my kids' teachers. SO much fun to make; I'm way behind on this trend, but been eyeballing it for-evah!

    Stamped Crayon Kids (retired) in white craft on black CS for the chalkboard background effect. I will never get rid of my Crayon Kids set! (and Crayon Alphabet lowercase!)

    The rest is pretty self-explanatory, Headline Alpha for the names, Crayon alpha for the 'mrs' (on new smaller Tag Punch). Random eyelets, paper clips, ribbons.

    They are all on display in classrooms, which is nice.

    Labels:

    07 January 2007

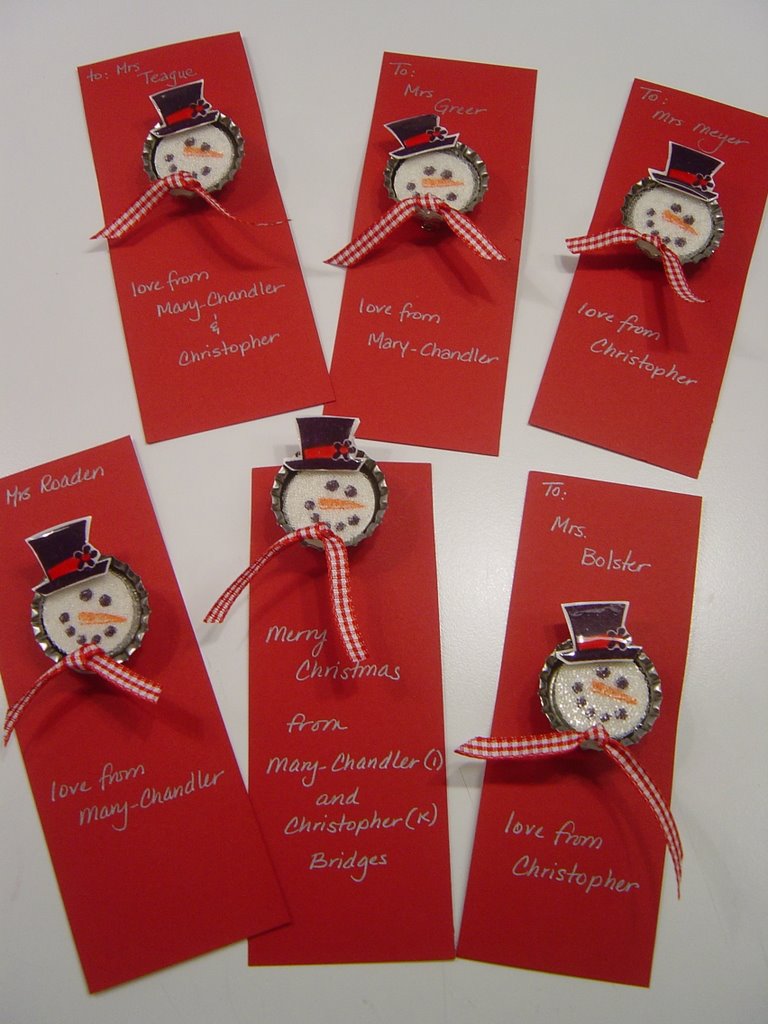
    Snowman Pins

    Here is a pic of the bottlecap snowman pins I talked about a few posts ago. I made lots extra for teacher & random gifts as needed this season. Crystal Effects on the hat really strengthens the overall presentation (and makes it much more sturdy for wear!)

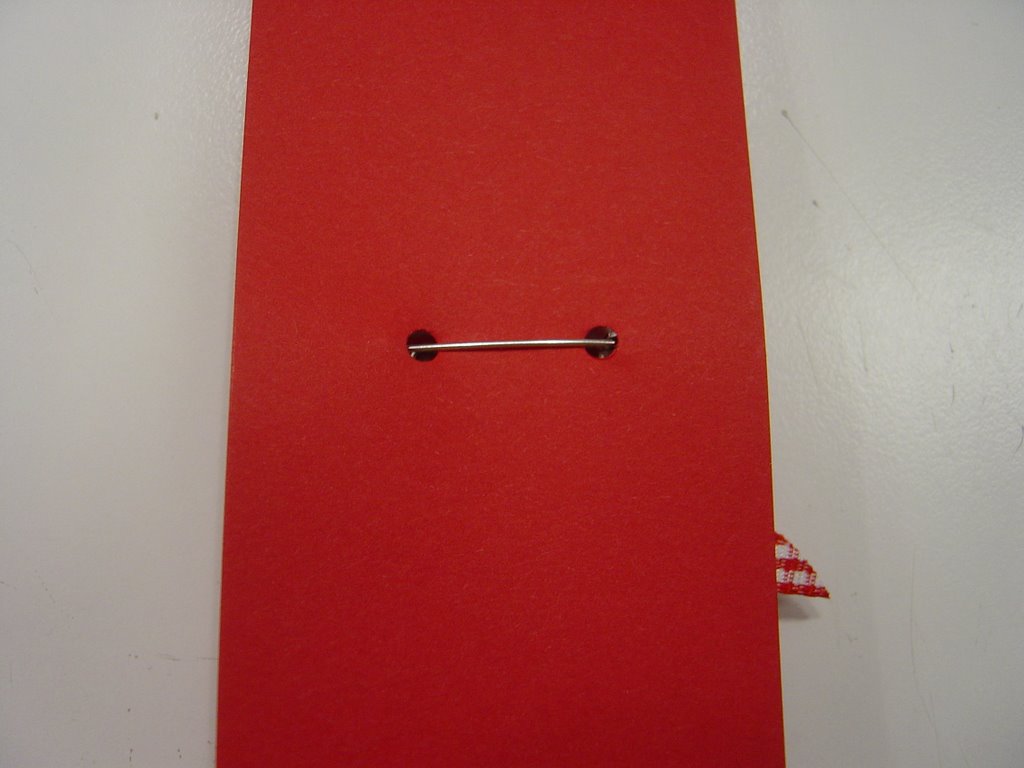
    I used scrap cardstock to present them with, and punched holes with the 1/8" circle punch to attach to pins (last photo). They were well-received, which is nice!


    Labels: ,

    22 December 2006

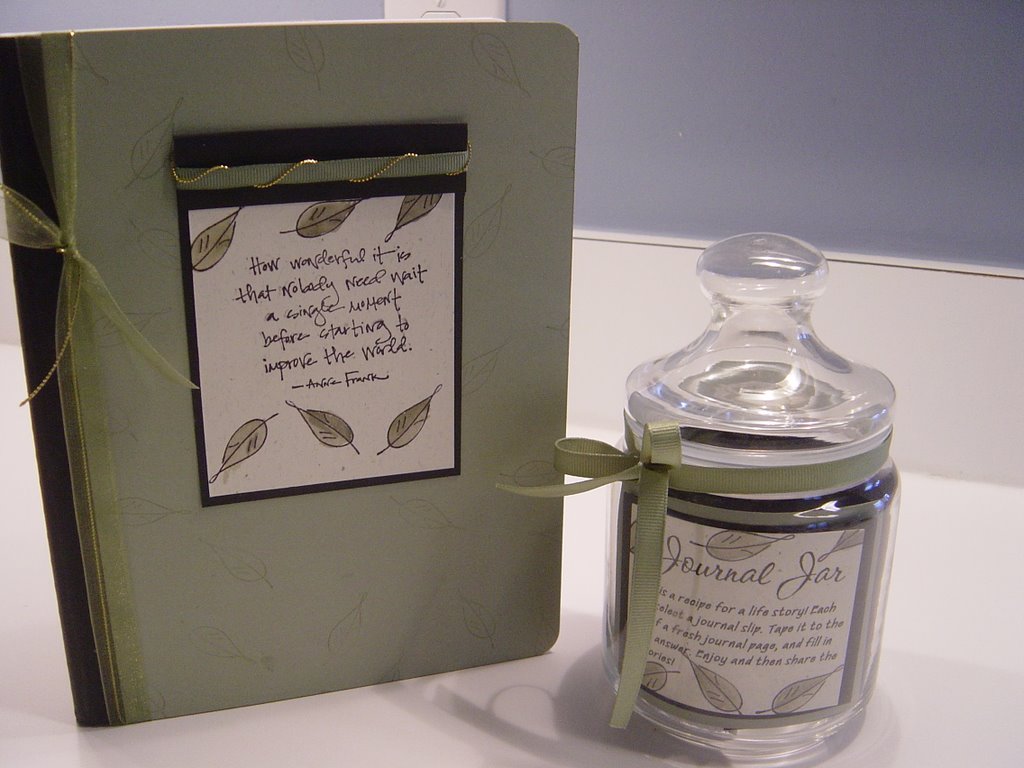
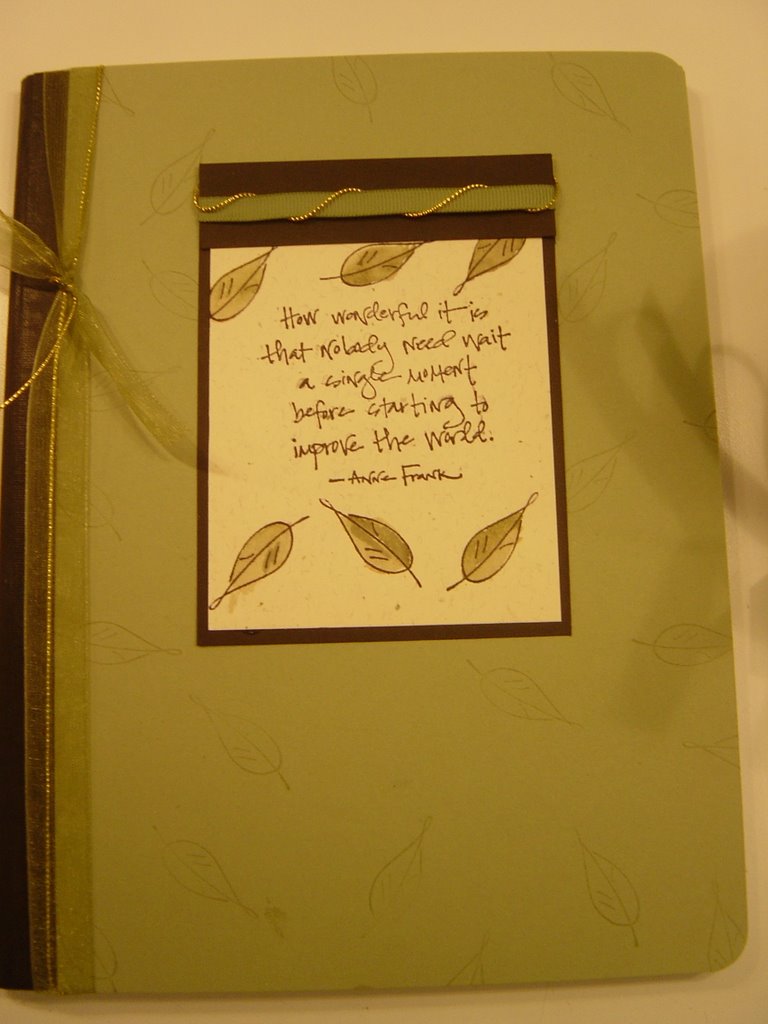
    Journal Jar

    A fun gift to give this Christmas, and so far very well received by the chosen few I decided would use it: a jar with journaling 'strips' (questions on paper, to answer in the matching journal). The instructions are printed on the jar with computer font (and the label on the jar is acutally inside the jar, preventing the headache of figuring out the adhesive to use on the jar).


    This photo is yuck for color accuracy, but wanted a closeup of the journal front:


    Stamp set: Sage Advice (retired)
    CS: Confetti Cream, Black, Mellow Moss
    Ink: Black and Moss
    Other: Moss Grosgrain, Gold Cord, non-SU sheer ribbon
    Adhered the CS to comp book with rubber cement b/c I'm low on sticky strip and it did well!

    Labels:

    02 December 2006

    November Stamp Club Projects

    As a thank you for the holidays, I made a little mini stamp camp for my Stamper Six clubs (we meet every other month, so next meeting is January). We made several projects using the Cold Play stamp set:


    Snowman Soup packets


    Tealight Luminary


    Bottle Cap lapel pins - I forgot to take pics of the pins we made, but I CASE'd this from SCS stamper Cambria. All these designs are inspired from the talented stampers on SplitcoastStampers.com

    My stamping friends~

    Labels: ,

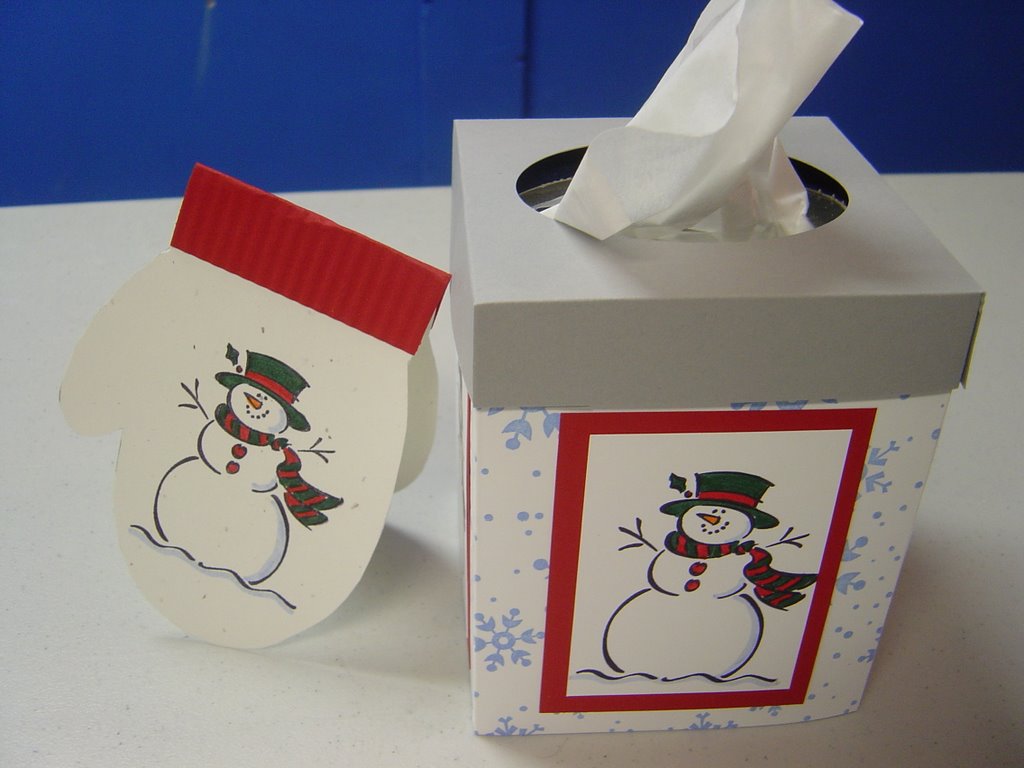
    Frosty Projects


    Look at these cute ideas my upline sent me. Love the Kleenex box, and the mitten card fits in a regular invitation-sized envelope!

    Labels: ,

    22 May 2006

    My Z Becky Brown

    These little traincase-looking purses are all the rage with stampers & scrapbookers, and if you Google it: NO, I did not pay retail for it. (My life verse? "Only fools pay retail") You can stalk them at joann.com and get them at 40% off if you're vigilant.

    I made a generic winter one, knowing I would be too lazy to change a Christmas theme before spring. Carry it all the time and receive compliments (though probably just because of the beautiful kids on it). Now I need to do a Spring/Summer one!

    Really like the colors I used together (Eggplant, Navy, SIlver, White).

    FRONT:


    REAR:

    Labels:

    15 January 2006

    Snowman Paperclip

    This waa CASE'd from some fabulous stamper on SCS, and used for one of my stamp clubs as a gift.


    Labels: ,

    14 January 2006

    More Altered Clipboard & Domino Zipper Pull

    I'm in love with these things; here's the first one I did that doesn't function as a clipboard, but a post-it holder and mini bulletin board (with glass pebble thumbtacks). Then pen has a magnet to stick on the metal clip at the top.


    And a backpack zipper pull (I am also currently in love with dominos and StazOn ink):

    Labels: